Pages

Showing posts with label Dinner. Show all posts

Wednesday, November 26, 2014

Easy Homemade Cranberry Sauce {Make Tonight in less than 20 minutes!}

I love homemade cranberry sauce. Every year I ponder why I don't make more of it all year long. It's just that good. You can make your own in less than 20 minutes with only 4 ingredients, 5 if you count the water. Yep, that's right. So lets do this!

What you need:

1 bag of cranberries
1 cup of sugar
1 orange
1/2 tsp of Pumpkin Pie spice
1 cup of water

Grater or zester
Stove pot to cook with
Spoon
Strainer
Bowl for underneath strainer
Canning jars or container for storage


What you do:

First you need to zest your entire orange, you should yield about 1 tablespoon of zest. I use a Progressive Grater Pod, I love that thing, took me about a minute to zest the whole orange! But you could use a grater if that's what you got! Once you have your zest, squeeze out the juice from your orange, which should yield about half a cup. If you have a juicer, use it (thanks mom!). Combine all ingredients over a medium high heat for about 10 minutes or until your berries are tender and have burst open. Now is the time to do a taste test. If you want it sweeter, now is the time to add more sugar. I personally like it to have a little tart kick so this is perfect for me. Once the taste is just right, take off of the heat and spoon about 1/3 of the cranberries into the strainer over the bowl. Press down and get all of the juice out. Pour the juice you strained out into the bowl back into the pot, mix and store. This makes enough to fill 3 jelly jars!

Tips, tricks and substitutes:

Roll your orange to release the oil and juices. You will get a lot more by spending 20 seconds rolling your orange between your hand and the counter.

Don't have an orange? Use half a cup of orange juice, or even a spoon of orange juice concentrate!

If you are new to canning, make sure you heat your canning jars under warm/hot water before adding the hot cranberry sauce. Leave about 1/2 inch between the top of the jar and the cranberry sauce. My cans always seal themselves by putting the lid on right away, after cleaning around the top of the jar first.

Straining is optional! If you like a thicker jelly you don't need to strain. Also, if you don't like pieces of cranberry you can strain the whole thing, but that might take 30 minutes instead of 20!

This is a great thing to make with the kids too. They love to watch those berries burst and I've made homemade cranberry sauce lovers out of all of them.


There you have it! Easy, fast and better than the can!


Sunday, February 2, 2014

The Best Grilled Cheese

I love grilled cheese.  It combines two of my most favorite foods cheese and bread, what's not to love? But my favorite recipe uses sourdough bread (Pepperidge Farm, Farmhouse Sourdough is my fave), 2 slices of colby jack and some Smart Balance butter on both sides...divine.  The sourdough gives it just enough kick and the colby jack mellows it out.  The kids always eat it up and so do I! So go on and try out a new grilled cheese, you're gonna love it too!


Monday, June 11, 2012

June 2012 Ten on Ten

I would have had my Ten on Ten posted yesterday, but my husband send me a link to a zombie game called Rebuild for my phone.  Oh my word I couldn't put it down!!!  We did pretty much nothing on the tenth.  The only thing on the agenda was to watch the F1 Canadian Gran Prix at 1pm.  Saturday was a much more eventful day.  I ran a 5k in the morning and we had a late movie date that night at the theater (gasp!).  The old grey mare ain't what she used to be.  My early 20's self could have gone to the bar after the movie and closed it down.  Instead we went home and I was in bed by 1:30.  Lame.

8am- Jack watching Regan "build a fire so she could make s'mores,"
they really, really, really like s'mores.
9am-  Poor Ethan, after that fire building didn't work out the
little ones invaded his Lego building.

10am- Caught sneaking Almond Milk!!
11am- It would be nice if Jack didn't rip them off.  
12pm- Fresh garlic from the Farmer's Market.
It's a variety from Kazakhstan and it's so good! 
1pm- Time for homemade chili and dogs and my boyfriend
Fernando Alonso in his Ferrari.
2pm- The "Rock Garden" jar in the kitchen.
3pm- My favorite pillow to nap on.
4pm- Regan gets to go to my Mom's house for 2 whole nights all
by herself.  She is so thrilled!  It's a big girl privilege.
5pm- After chili dogs for lunch I needed a salad for dinner.
It did not disappoint!

Please check out Rebekah's blog A Bit of Sunshine and see the other entries and next month join us!

I am a Semi-Finalist for Fashion's Night Out Tulsa!!! Please clink on the link and vote for me (Julie) to be a Finalist and win a makeover and personal stylist consultation!  Voting ends June 18th, you don't need to be a resident to vote.  Thank you!!!!  Oh and my kids will get to see me on TV which would make me the coolest Mom ever, so vote for the kids :).


Thursday, May 31, 2012

Campfire Cowboy Skillet


You're going to have to do a hike to burn this off but it's really yummy and uses up camp leftovers like nobody's business.  I made this for lunch and it was a hit.  Especially with the hubs.

What you need:

Leftover bacon and sausage from breakfast (we had about 6 strips of bacon and 3 patties leftover)
1 lb of ground beef
1/2 onion chopped
1 big can of Bush's Original Baked Beans
Approximately 3 tablespoons of Barbecue sauce
Large cast iron skillet
Hungry Campers

What to do:

Cook the ground beef and onion together in a cast iron skillet on a grate over the fire.  It helps if you have it  not perfectly level so that the grease kind of self drains to one side of the skillet.  While the ground beef and onions are cooking cut the bacon and sausage into bite size pieces.  Once the beef and onion mixture is cooked drain off or use paper towels to remove as much grease as possible.  Add the bacon, sausage, can of beans and barbecue sauce.  Let simmer over fire about 5-10 minutes.  Serve with crackers, chips, corn bread, anything you have on hand.  Enjoy!

Tuesday, May 15, 2012

The Best Alfredo Recipe


For the longest time I thought that I didn't like Alfredo sauce.  I had tried it off my husband's plate every time he ordered it and even tried it from a jar.  I always thought it was just okay and I never thought it was good enough for all the fuss people seemed to make over it.  Then when it was my turn again to take our friends food after the birth of their son so I asked them if they had any requests.  Well the first was for more homemade bread and the second was for Alfredo.  So I did what any good blogger would do and looked for a recipe out in the blog world.  And boy did I find it.  Kevin & Amanda provided me with a fabulous recipe and a new staple in the Jones house.  

The recipe from Kevin & Amanda makes a Chicken Alfredo, which is what is pictured in my version (my chicken was cut into strips).  However, I've found that I can make just the Alfredo and it's less work and still ridiculously good.  So good my husband gives me googly eyes when I make it.  So good that my mother called and told me I had ruined her dinner because her jar of Alfredo tasted awful after having mine.  I also omit the parsley because I don't particularly care for it and I don't grow it (meaning I just have to go out to the garden for the basil and sometimes that is as far as I want to go, lol).  I also reduced the pepper because I'm not a huge fan and I didn't want to hear any complaints from the "it's too spicy" whiners department.  So here we go.  Beware, this is full calorie deliciousness so check your diet at the door.


What you need:

Enough Pasta of your choice for your Posse (I use a box of penne pasta from Target) 
1 scant cup of chicken broth (Scant means a little less than) (I used Emeril's Organic it was delicious)
2 cups of heavy whipping cream
1 cup of grated Parmesan cheese 
3 cloves of fresh minced garlic
2 Tbsp cornstarch
1/2 tsp salt
1/4 tsp fresh ground pepper
8 basil leaves, chiffonaded  (to chiffonade the the basil roll the leaves together and then make small cuts in the roll from the top of the leaves down to the stems, you will be left with beautiful little strips)


Instructions:

Bring the chicken broth to a boil over a medium heat.  While it's heating up mince your garlic.  Once the broth has come to a boil, reduce heat to medium and add garlic, cream and cornstarch.  Whisk while bringing to a soft boil for one minute.  Reduce heat to low and add Parmesan, salt and pepper.  Whisk occasionally while allowing your flavors to incorporate and your cheese to melt.  While you're waiting cook your pasta.  Two minutes before your pasta is done, chiffonade your basil and add to sauce.  Drain pasta and return it to pan (no heat).  Immediately pour the sauce over the pasta and serve.  


Now your table will either be really quiet or filled with gasps and ooohs and aahhhs.  Either way you'll be smiling and you probably won't have any leftovers.  I paired my Alfredo with a Caesar salad and a homemade Baguette.  It's one of my favorite meals and comfort food for sure.   


Friday, March 30, 2012

I'm gonna party like its my birthday, because it is!

It's Friday!  But even better its my birthday!  A lot of people don't make a big deal about their birthday the older they get but I keep making a bigger deal out of it every year.  I'm entering the last year of my 20's.  If you're in your 30's or whatever don't hate, I'll be there soon enough.  I spent my 20's having babies, 4 babies.  That means 3 whole years of my 20's were spent pregnant.  You're not jealous anymore are you?  Pregnant, nursing and fat is how I spent the majority of them.  At 29 I am the skinniest I have been in my 20's and I'm going to crush this last year.  I lost a lot of weight in the last year and being so close to my goal and close to hitting the big 30 has me more motivated than ever.  Bring it 29.

So I bet you're wondering how I'm going to spend my fabulous day, right?  Well first I'm dropping the kids off at school and getting my birthday coffee from Starbucks.  I'm getting the biggest and most caloric thing I can with a shot of espresso.  Then I'm going to Walgreen's to pick up some prescriptions for the littles.  Brace yourself for these awesome things: laundry, dishes, mopping the kitchen (its only been 2 days but for real its gross), calling the dentist to set up my x-ray, calling and setting up my hair appt (mama's getting her hair did) and taking a nap with the little ones.  I know, pure awesomeness.  We're having grilled cheese for dinner outside because its my birthday and that's what and where I want to eat.  Remember I'm going to hard core mop the floor so I'll be damned if it gets some crazy amount of dinner on it, just give me a few hours of clean okay kids?  I'm making Dale take a walk with me 29 times for my present starting with tonight. I want him to live forever (or just The Notebook style and as long as I do) and secretly I know he will become addicted to it especially if he does it 29 times.  I have walking withdrawals from not going yesterday.  We are going to sing happy birthday (for the umpteenth time) and eat ice cream and maybe a spoon of Nutella and have extra snuggles and extra stories because its my birthday and I get to spend it with the people I hold most dear in the world.

Perhaps the best present I got this year was from my Mom's surgeon who called her with her pathology report saying they did indeed get all of her cancer.  She doesn't have to have anymore surgeries (the next one would have been really, really risky) and no chemo.  She is a survivor for the second time in my life.  Best present ever because I know it could have just as easily been the hardest birthday I've ever had full of uncertainty and sadness.  Best present ever.  I'm going to rock 29.

Ellie in her new glasses, I love her.

My favorite swing buddies.
My favorite Thunder player, number 10.

This guy who happens to be the love of my life.  Who told me to hurry up and finish blogging because I only had a  little bit of young left in me :) and I should spend it with him!

Friday, February 10, 2012

Homemade Hamburger Helper

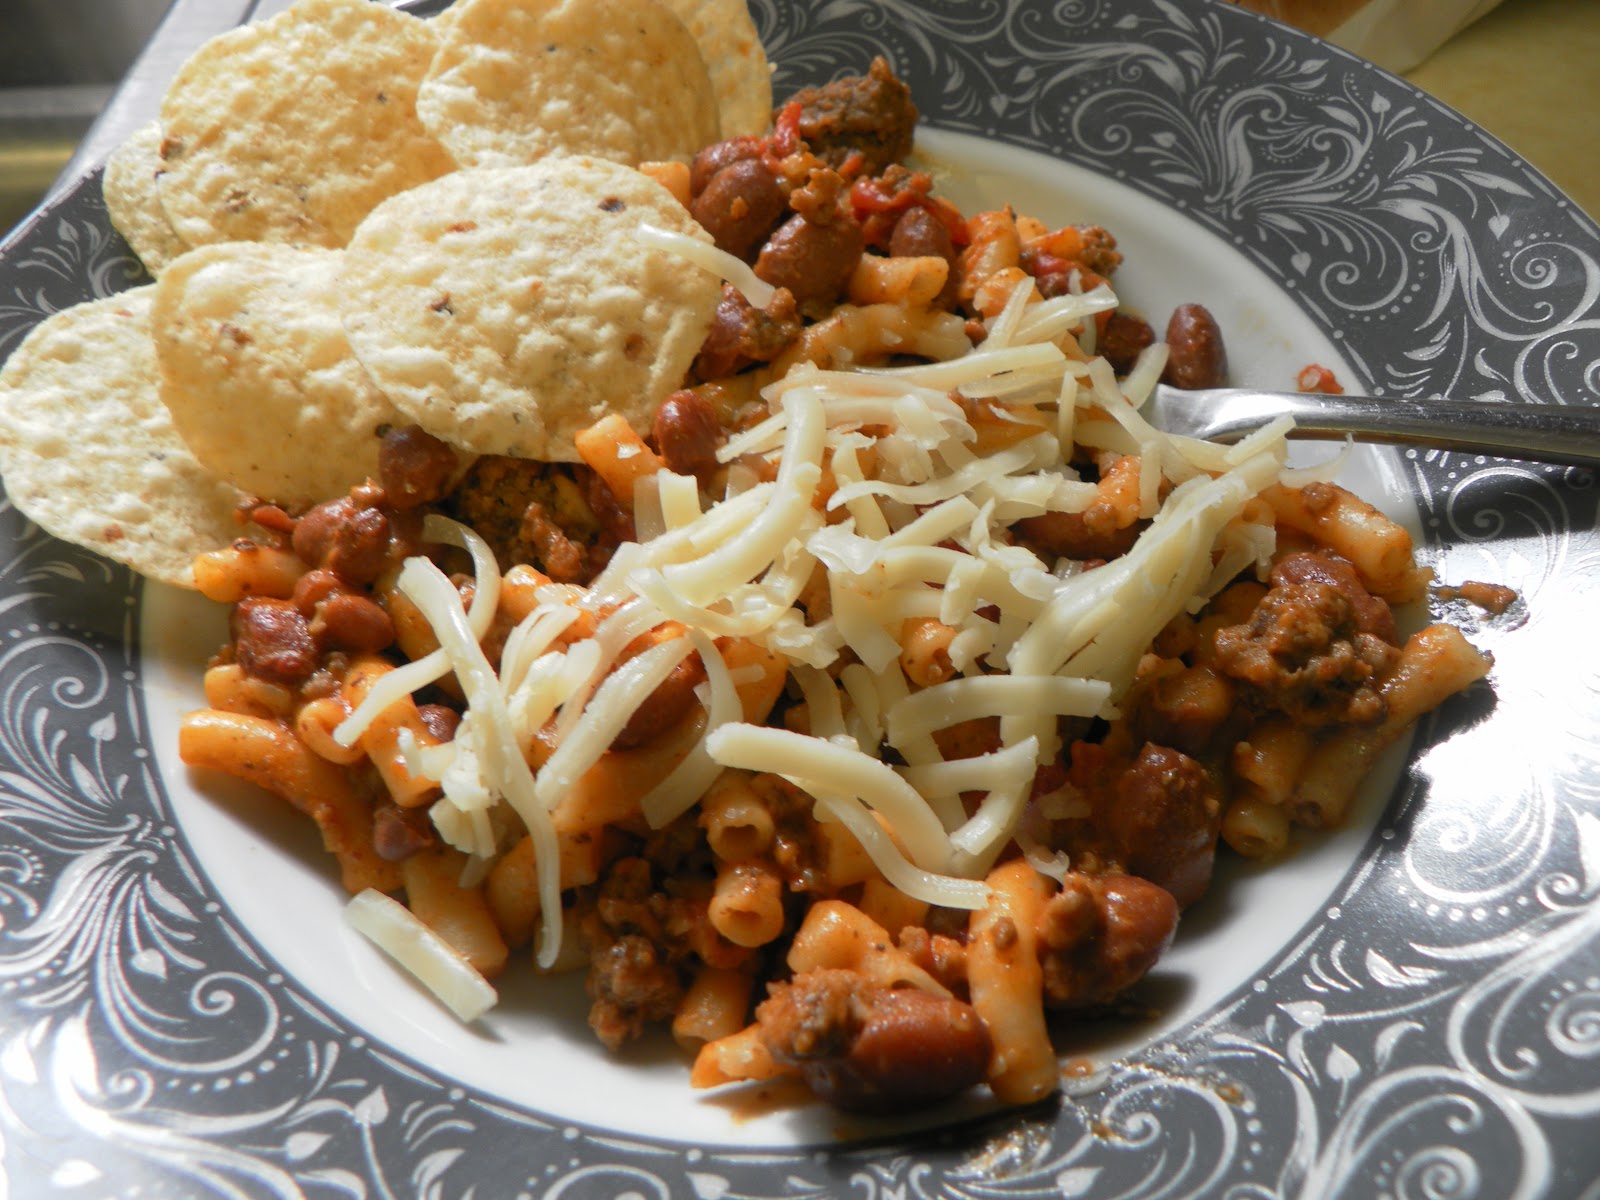
Well you could call it goulash but whatever you call it, its good and its pretty good for you.  Especially if you sneak in some veggies.  Which of course I do!  Here's what you need to make a fast and tasty meal that your kids will eat up.

Julie's Homemade Hamburger Helper- Chili Mac

Ingredients:
One box of Mac and Cheese (I use Annie's Organic Mac and Cheese)
1 can of diced tomatoes
1 can of chili beans
Sneaky vegetables
Ground Beef, about 1 lb

What to do:

Start by cooking the pasta according to package directions minus 1 minute.  When you combine everything later the pasta will finish cooking.
If you haven't pre-cooked and frozen your meat, brown your meat.
Once the pasta and meat are done, combine all ingredients and simmer over Medium low heat for about 5-10 minutes.

There you go!  Easy peasy and delicious meal in about 15 minutes.  You can even top it with shredded cheese if you like.  The kids will never even know that you added those Sneaky Vegetables and they will give it some nice flavor.

Paired with Monterey Jack cheese and Tortilla Chips.  


Thursday, February 9, 2012

Sneaky Vegetables

I'm rather lucky in that my kids will eat most anything.  They each have their own little dislikes, but they all eat salads and vegetables.  So why sneak in more veggies? Why not?   If I can add more nutrition and in most cases more taste to my meals without compromising the good thing I've got going I'm all for it.

Lets take onions.  You could read more about there nutritional value here.  Take my word, they are good for you.  For a kid though, they can be a texture issue, or the taste is too intense.  So what is a mom to do?  Keep reading, we'll do this together.

Lightly chop one onion and one each of red, green and yellow bell peppers.  Saute them together with a spoonful of butter, garlic powder, season salt, pepper, all to taste.  Place the mixture into a food processor or mixer and puree it.  Separate the mixture into an ice cube tray and freeze.  Once they are frozen you can pop them out of the ice tray and put them into a ziploc bag.  Now you have Sneaky Vegetables, in an easy to use cube form.

If I make a soup, chili or homemade hamburger helper I add Sneaky Vegetables to it.  Not one kid has noticed.  They just eat away.  You can do lots of other vegetables like mushrooms, squashes and tomatoes.  Its kind of like making baby food!  I'm sure someday they will catch me tossing a cube in and when it does I'll just tell them its a tasty cube, that I use to make everything taste yummy.

Buy the veggies when they are on sale...save yourself some green too!


Tuesday, February 7, 2012

Shrimp in the Crock Pot or Wok

Oh my!  I really had my doubts about this one.  Not only did they turn out really good, but we are going to experiment with the ingredients substituting fish, it was that tasty.  Everyone ate them up.  I found this recipe on A Year of Slow Cooking and she got it from The Pioneer Woman.  So here's my version.  Isn't that what cooking is all about?  Finding a recipe and making it your own?

Ingredients:


  • 2lbs of raw shrimp (mine were peeled and frozen, thaw before you cook them)
  • 1 stick of butter
  • 1/4 cup olive oil
  • 1/4 cup Worcestershire sauce
  • 1-2 T of Tabasco sauce (I used 1)
  • 1 tsp salt
  • 1/2 tsp pepper (PW uses much more and Slow Cooking uses 1 tsp) 
  • 3 lemons, juiced
  • 1 T basil (I used the stuff from my spice rack, but by all means use fresh if you can)

What you do:

If you make this in the crock pot- combine everything and cook for about 2 hours, checking every 30 minutes.  That's it.

If you make this in your wok- combine everything and cook on low for about 10-15 minutes or until done. 


I've made it both ways and both were delicious.  There is some major excitement over shrimp night.  I served mine over brown rice that had been cooked using some of the shrimp juice.  Oh my, it was delicious.  I also paired it with green beans and a baguette.  This recipe is a keeper.

On a personal note, I have a sick little one this week so posting will be few at best.  I will also probably get sick myself, as Jack just coughed in my ear for the second time. He's already coughed in my face at least 3 times I can remember.  This weekend I will be performing a one woman show of Tangled because that is his favorite movie and I don't care how many times we watch it if it makes his sick little self happy.  If you haven't checked out the FlyLady you should do it.  I can sit and watch Tangled all day long guilt free because my house is clean.  It's a miracle I tell ya!

Saturday, February 4, 2012

What's for Dinner? February Meal Plan

For some reason I had a hard time creating this months meal plan.  There were a few days where I just wasn't sure what to do.  It's going to be a busy month with basketball playoffs.  So my plan has to be pretty flexible.  There are also things like our Valentine date which I scheduled Mac and Cheese, I like to make it easy on the grandparents.  I also add sides according to what I have fresh on hand.  If we are out of fresh I will go to a frozen or canned back up.  The number represents the date of the month.

1-Pork Chops
2-Baked Potatoes
3-Shrimp
4-Roasted Chicken
5-Super Bowl, Party Food
6-Chicken Quesadillas
7-Meat Loaf
8-Potato Soup
9-Pizza
10-Chili
11-Mac and Cheese
12-Leftovers
13-Ham and Beans
14-Homemade Hamburger Helper
15-Pork Chops
16-Sandwiches and Soup
17-Shrimp
18-Spaghetti
19-Pizza
20-Roasted Chicken
21-Breakfast
22-Potato Soup
23-Chicken Quesadillas
24-Leftovers
25-Pizza
26-Pork Chops
27-Mac and Cheese
28--Chili
29-Spaghetti

This month I'll be posting recipes for Crock Pot Shrimp and my Homemade Hamburger Helper.  I'll also show you how to add "Sneaky Vegetables" to meals you make.  I add them in all the time.  So meals like Mac and Cheese, Spaghetti and even Pizza are full of added veggies.

Tuesday, January 31, 2012

Three Cheese Breakfast Melt

Martha Stewart is on my DVR list.  I usually watch her in the afternoons when Jack wakes up from his nap but is still sleepy so he uses me as a human pillow.  Its kind of our thing now.  He hears the opening music and turns his head over and goes back to sleep.  Last week we had breakfast for dinner on the menu and they happened to make a Murray's Breakfast Melt.  It looked so yummy and I had all of the ingredients except the fontina cheese.  So we made them my way for dinner and I got rave reviews.  "Mom these are so good!' and "Dad better get here fast or we're eating his!"  Some meals are meant to just be enjoyed regardless of their caloric content, this is one of them.

Julie's Three Cheese Breakfast Melt:

Ingredients:
English Muffins- 1 per melt
Eggs- 1 per melt
American Cheese- 2 slices per melt
Mozarella and Monterey Jack cheeses enough to sprinkle some on each melt
Bacon- 1 slice per melt

Recipe:
Start by frying your bacon and turn your broiler on low.
While the bacon is frying separate the English muffins and lay them out on a baking sheet (I lined mine with foil.)
When your bacon is done, set it on a paper towel to drain.  Use a brush to "butter" the muffins with bacon grease.  Put them in the broiler and carefully watch them brown, should take about 1-2 minutes.  While they are browning start your eggs.
Start them like you would an over medium fried egg, but before you flip them (almost all of the egg white should be cooked) use a fork to break the yolk.  Once you flip them sprinkle mozarella on top of the egg and turn the heat off.  They will continue to cook on the bottom and the cheese will melt.
When the muffins are lightly toasted add a slice of American cheese to each side of the English muffin.  Let them melt (takes just a minute) and then pull them out.  Immediately place 1 piece of bacon, broken in half and placed in an X formation on one side of the muffin, sprinkle with monterey jack cheese.
Place the egg on top of the bacon/cheese and top with the other half of your muffin.  Stand back and enjoy your masterpiece.


By golly these are good.  Definitely a once every month or two kind of dinner, or breakfast.  I'm sure there are some low cal options to this, like turkey bacon, less cheese, no bacon fat but I'll just eat this sparingly and enjoy every bite.  Pair it with some fresh fruit and don't feel guilty!

Monday, January 23, 2012

Banana Pecan Pancakes Recipe

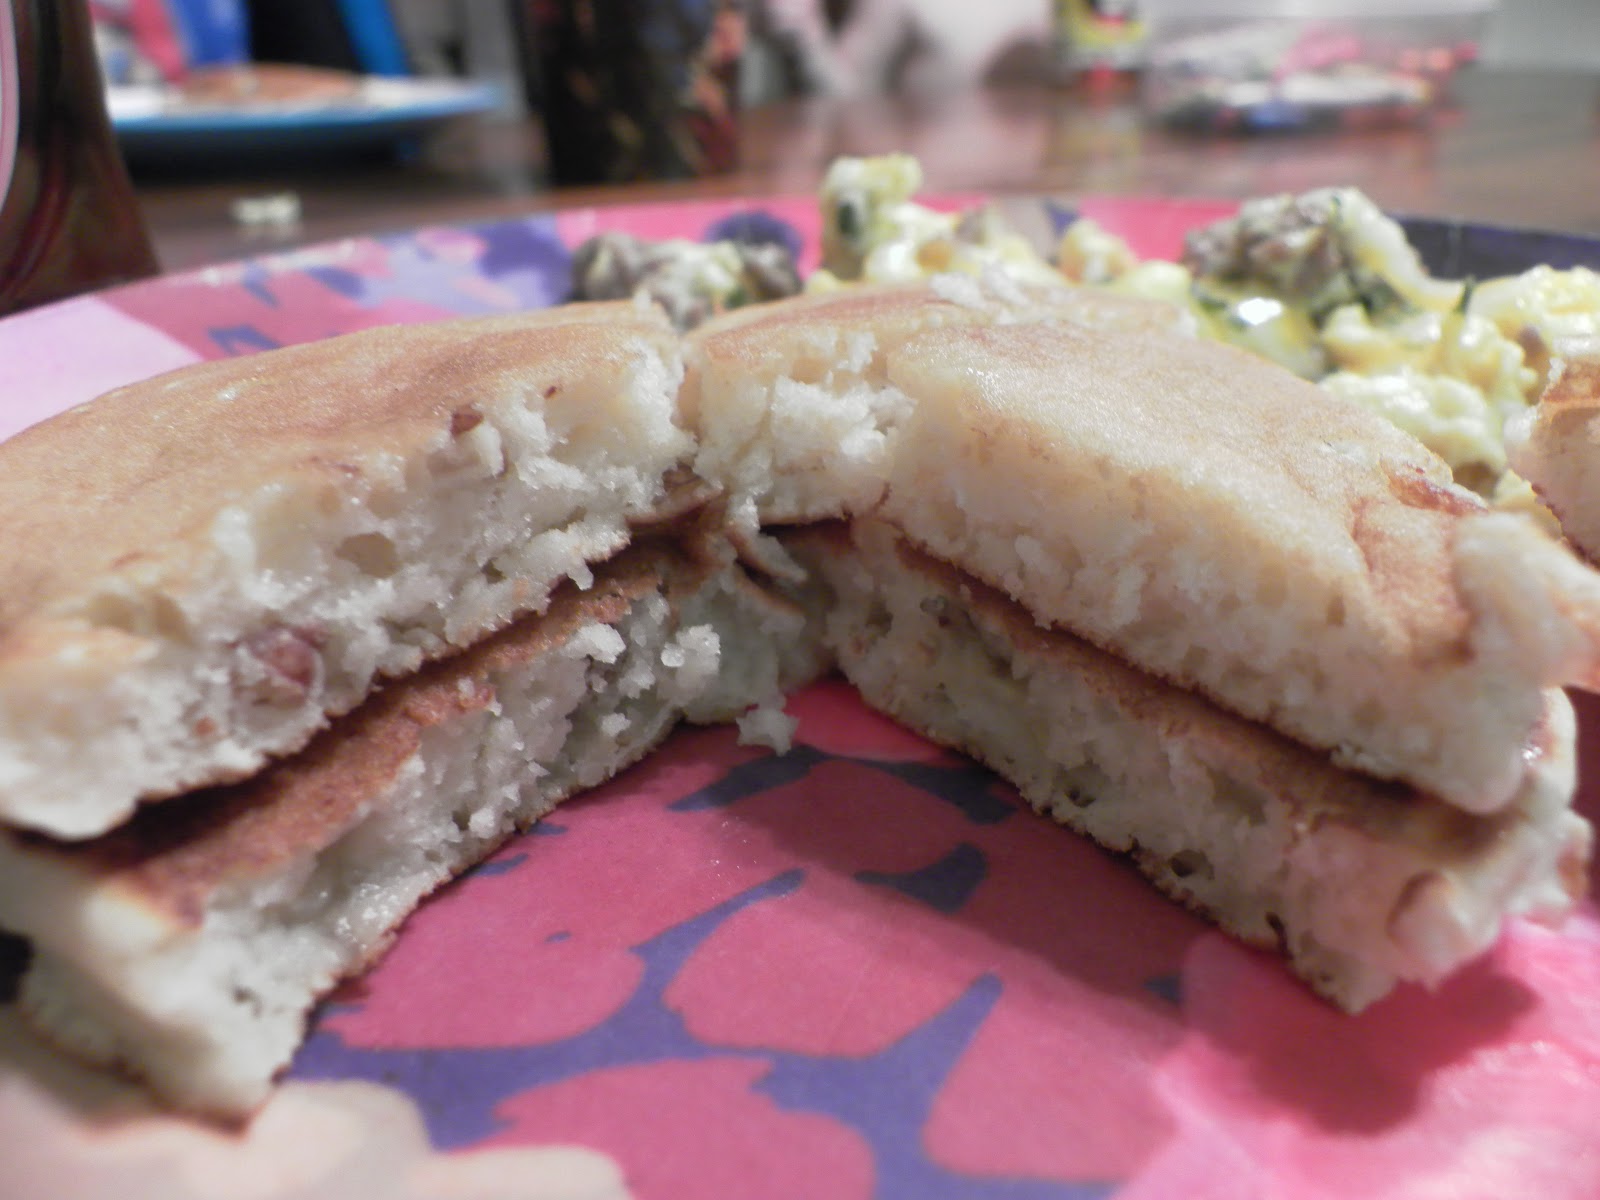
Oh so decadent.  Add some maple syrup and I guarantee you'll be in heaven with these.  One of the meals we have at least once a month is breakfast for dinner.  It's kind of like a free-be for my oldest who is not too fond of vegetables, although I've started sneaking in pureed vegetables into everything (shhh don't tell him).  I normally make pancakes or banana pancakes but since the holidays are over I found that I had bought an excessive amount of pecans and dropped some in the batter this time.  It was one of my best ideas ever!  The kids were done eating and asking for seconds by the time I sat down with my plate.

The recipe:

1 cup of flour
1 tablespoon sugar
2 teaspoons of baking powder
1/4 tsp of salt
1 cup of milk
1 beaten egg
2 tablespoons of vegetable oil
1-2 very ripe mashed bananas
1/2 cup or more chopped pecans

Combine ingredients until all are incorporated, be careful not to over mix.  Cook on hot griddle and enjoy.


Here they are pre-syrup.   I knew once I put the syrup on I wasn't going to pause to take a pic.

Still working on a good recipe for a home made hair conditioning treatment.  I'm sure it would be funny to see me with all of the goo on my hair so when I make a really good recipe, worth sharing, I'll post some good pictures of my hair covered in goo.  It has been fun trying them out.  Regan has given me some really amused looks, especially when I put mayonnaise in my hair.  She ewwwed that recipe.  I'm trying out a new one this week.  We shall see.  While I really enjoyed being unplugged last week, it feels good to be back.

Friday, January 13, 2012

Easy Baked Potatoes from the CrockPot

Seriously one of the easiest dinners I've ever made.  Before I got organized I would never make baked potatoes because I just didn't have my self together enough and I was throwing dinners together at the last minute with what I had on hand.  I usually had plenty to choose from, but if it required more than 20 or so minutes it wasn't going to happen.  It also really stressed my husband out that I didn't know what we were having in the morning, his mom would set out what they were having in the mornings and so it was what he was accustomed to.  Whereas my mom worked a lot of overtime and I made a lot of meals for myself as I got older, just throwing them together at the last minute.  While my husband has never cared what we ate for dinner, this process really caused us to talk about how our childhood influenced our expectations for everyday life.  Hmm maybe a little deep for a post about Baked Potatoes?  Well life is pretty deep!


  • You need enough potatoes for your family, but you don't want to stack them on top of each other, which was about 7 for my Crock Pot.
  • Wash and take out any bad spots.
  • Stab your potato with a knife, but don't stab yourself because no one wants to eat bloody potatoes.
  • Dry thoroughly- Stephanie explained that if you don't there will be rust.
  • Wrap in foil and place in the Crockpot.
  • Bake them on Low for 10 hours or High for 6 hours.  Mine were done after 9 hours on Low and I just moved my setting to warm.
They turned out perfect.  I used leftover chili, cheese and cooked up some bacon for toppings.  I paired it with green beans, grapes and a Baguette.


Wednesday, January 11, 2012

January 2012 Ten on Ten

I fully intended on posting my Ten on Ten on the tenth, but instead we took the older kids to a skating party and by the time we got home and got everyone in bed there was no way I was plopping down at the computer!  By the way, you should totally go couple skate with your husband, its fun and makes you feel like you're 15 again.

7am Best thing to wake up to.

8am Crock Pot Baked Potatoes, dinner prepped and they were really good

9am-I put Tangled on, he loves Maximus and I think he's crushing on Rapunzel

10am- Made some new play dough

11am- Still play doughing and I made a Pascal

12pm- A good book before nap. Gosh I love those Classic Golden Books


1pm- My partner in dish crime.  Love looking at this while I do dishes.
2pm- Coffee time?

3pm-Awake and making music.  They love this Kitty Piano
4pm- Fresh baked bread for dinner, oh gosh its yummy!
Check out other Ten on Ten posts at A Bit of Sunshine.  And if you didn't do it this month get on board in February.  My goal is to do it every month this year!

Monday, January 9, 2012

The Best Chicken Enchiladas

My family ate these up.  I'm talking the kids hovered around the pan of cheese sauce and licked it clean before the enchiladas were done baking.  The recipe is fairly straightforward and the ingredients are simple.  I found the recipe on Pinterest and its from a cute little blog Joyful Momma's Kitchen.  This recipe is a keeper.

The Recipe:

10 Soft Taco Shells
2 cups of cooked and shredded chicken (I used the leftovers from a Roasted Chicken)
2 cups of shredded Monterey Jack cheese (I used up to 2 1/2)
3 Tbsp. Butter
3 Tbsp. Flour
2 cups Chicken Broth
1 cup of Sour Cream
1 4oz can of Diced Green Chiles

Preheat your oven to 350 degrees.  Grease a 9x13 baking dish.  Mix the chicken with 1 cup of the shredded cheese.  Roll the mixture up in the tortillas and place in the pan.   In a sauce pan, melt the butter and stir in the flour cooking 1 minute.  Add the broth and whisk until smooth and heating until it is thick and bubbly, about 3-4 minutes.  Turn the heat off and stir in the sour cream and chiles.  If you have a picky eater that will freak out about the green things in the sauce puree them in a food processor first.  Pour mixture over the enchiladas and top with the remaining cheese.  Bake for 22 minutes and then under the broiler for 3 watchful minutes to brown the cheese.

They have just the right amount of kick to not be too spicy for the kids but just enough for a more mature palate.  Next time I think I will make the sauce first and then add a bit to the chicken and cheese mixture inside the tortillas and maybe add a bit of cheddar cheese on top.  The kids can't wait to make it again!

Tip:  Use a utensil to hold the tortillas in place as you roll and put them in the dish.  Otherwise they tend to come unrolled and give you grumpy face wrinkles.  

"Hurry up Ellie my mouth is open!"  Oh and Regan  is dressed for a picture.

Oh cheesy goodness.  Not low-cal tonight!


Thursday, January 5, 2012

Crock Pot Rice Recipe

Go ahead and judge me, I can cook and bake all sorts of things but I am a horrible rice cooker.  I even, oh my I can't believe I'm admitting this, have a rice cooker and I can't make rice in it.  I tried twice, it was awful.  Really it is my husbands and for some reason it just doesn't like me.  So when I was at Stephanie O'Dea  reading her 365 Slow Cooker recipes and came across rice I thought "I can totally do this."  So I did and it turned out pretty good.  I printed out the recipe when I was meal planning so all I had to do was go to the back of my House Journal and start cooking.  

Here is the recipe  from her 365 days posts:

Rub one tablespoon of butter around the bottom and sides of the crockpot
Add 1 cup of rice
2 cups of water
Pinch of salt

Cook on high for 2-3 hours checking every 45 minutes.  Stephanie's was done after 2 hrs and 15 minutes.  Mine was done after 2 hours.  I could tell after the second checking that  it didn't need another complete 45 minutes.  I also modified it by adding a chicken bullion cube at the first 45 minute check because we were having chicken and I wanted it to be extra yummy.  I also used short grain brown rice.  

It got mmmm's and every one ate it.  Jack shoveled it in his mouth, which always makes a mother proud.  I made a roasted, butterflied chicken, salad and a baguette.  It was a yummy meal.  Definitely keeping crock pot rice on the menu. 


Thursday, December 15, 2011

Food for Blog: Baguette from The Sisters Cafe

I love making homemade bread.  Unfortunately it doesn't always turn out the way I want it too.  I have a bread maker but I haven't really mastered that and there's just something about using your hands that is really appealing.  So when I saw this bread pinned on Pinterest I thought I would give it a try, it did claim to be quick and easy and it was.  The Sisters Cafe has some really delicious looking recipes and I can't wait to try a few more.

Here is the recipe:

1 1/2 cups warm water
1 1/2 Tbs. (2 packages) dry yeast
2 tsp. sugar
3 1/4 cups flour
2 tsp. salt
In a small bowl mix the warm water with the yeast and sugar. Let it sit for about 5 minutes – foam should form on the top.
In a large mixing bowl combine the flour and salt. Gradually add the yeast mixture. Mix until the dough becomes a smooth ball and knead for 5 minutes.  If you have a Kitchen Aide now is the time to use it, otherwise you'll get a nice tricep workout!
Cut in half and then shape into 2 baguettes. To make them smooth and pretty, roll each half of dough into rectangle and roll up lengthwise. Pinch the edges to seal and place on lightly greased cookie sheet (or silpat) with seam down. Cover and let it rise for 30 minutes.
Preheat oven to 450 degrees. With a very sharp knife (I like to use a serrated blade) gently make a slash down the length of each baguette. This will give it that authentic look. Pour water in a cookie sheet and place it on the bottom rack of the oven. Bake the bread for 15 minutes. Half way through, brush the bread with melted butter. 

From the comments on the original posting, some people felt it was a little bit too salty so I decreased my salt to 1 1/2 tsp instead of 2.   I also used bread flour.  I buy it in bulk at Sam's because its what I make my homemade pizza dough with so I have a ton of it on hand.  

Now for what you really want to know, how did it turn out?  Really, really delicious.  Those two loaves were gone in no time and my husband said I had definitely redeemed myself.  The last loaf I made was disgraceful, lol!  It had a little bit of a salty taste and I think decreasing the salt worked for us.

The second time I made this, I let it rise for about an hour and it was even better.  This recipe is a keeper!

This is the first batch, good, but the second was better and prettier.

He posed for me!

Perfect with a bowl of hearty soup on a cold day!