Pages

Showing posts with label recycled. Show all posts

Tuesday, May 29, 2012

Green Home {make your own fabric softener}


I love how easy and cheap it is to make my own fabric softener.  All it takes is 3 ingredients and about 5 minutes. I got the ingredient recipe from My Kitchen Escapades through Pinterest.  I loved her ingredients, I just hate measuring!  I like to keep it as simple as I can!  Especially doing laundry for a family of six.

{What you need}
1 bottle of cheap Suave conditioner-I use Ocean Breeze about $1.60 at Target
Distilled White Vinegar- I it at Sam's Club. 2, 1-gallon jugs for $3.58!  You will need about 1/2 gallon.
Hot Water
An empty 150-170oz old liquid detergent or fabric softener container (you're recycling!)

{What you do}
Empty all of the Suave conditioner into the container.  Add some hot water (as hot as you can stand it) to start dissolving the conditioner.  Alternate adding vinegar and hot water until your container is about half full and then shake vigorously.  You will get some bubbles but that's okay.  Add the rest of the vinegar until you have added about half a gallon.  Shake again and then fill the rest with hot water.  Give it another good shake and you are ready to go.  If you have a bunch of bubbles leave the cap off overnight and then add more water in the morning until you get to the top.

You've just made your own fabric softener for $2.49!  My container does about 200 loads which means I'm only paying a little over $.01 per load.  Compare that to the Member's Mark from Sam's at $8.48 and $.04 per load or Downy from Sam's at $11.98 and $.06 per load.  The savings is not only in my pocket book, but in my drying time as well.  The vinegar aids in line drying and not having crunchy clothesline clothes.  I also don't get a film on the lid of my washing machine or the area where you add the softener, so less cleaning!

I promise your clothes will not smell like vinegar and your wallet will be a little heavier!  Your clothes will still be soft and will smell clean.  You can always add your favorite essential oil if you want a heavier scent.  Use it just as you would the store bought stuff and yes you can use it in your HE washer.


You might also like:

Green Home {the clothesline}


Tuesday, February 28, 2012

The Upcycled Jean Pillows and a Pocket Pillow Tutorial

So yesterday I showed you my Upcycled Jean Quilt.  I had some extra soft material from the center cut of the blanket that I used for the pillow covers and I embellished with scraps leftover from the jeans and some vintage buttons.  If you are a real quilter please don't take offense to me using the term quilt and to my non-traditional methods.  My Grams was a real quilter and I sometimes wonder if she would just be happy that I'm sewing or if she is rolling over in her grave at my really non-traditional ways of doing things!

These are pocket backs, meaning the back is made to create a pocket for a pre-form pillow to go in.  I did measure these :).  First you need to decide what size pillow you want or have.  These require 3 pieces of material.  Alright we're going to do some math here, prepare your brain if necessary.

Say you want to make a a cover for a 12x12 inch pillow form.  For the front piece you will need to cut a square that is 13x13.  So for any front piece you need to add 1 inch to each side.  Now for the two back pieces.  Divide the longest side in half and add 3 inches (12/2)+3=9  So each side piece will be 13x9.

Here is another example using a rectangle.  You are making a cover for a pillow that is 16x12.  The front piece needs to be 17x13.  The back pieces need to be 11x13.  Got it?  Shoot me an email if you have any questions, math and sewing can be tricky.

Now if you want to add any embellishments you need to do it before you sew the front and back of the cover pieces together.  Trust me its really difficult if you don't.  I made jean "flowers"  by cutting out different size circles and stacking them together.  I sewed them down and then added brown vintage buttons.   For the striped pillow I took strips of denim and sewed them down.  Once washed they did they fray thing.

Once your embellishments are on its time to sew it up.  I got lucky and used the edges of the blanket for the back pieces so that I didn't have to hem them.  If I was making one from scratch I would hem the two back pieces along one of the longer sides, just a half inch hem will do.  If you don't have a serger (I don't) use a zigzag stitch.  Place your right sides together of the front piece and one back piece, pin and sew.  Make sure you back stitch when starting and stopping so you won't get any loose threads later on. Then place the second back piece on, making sure that it goes over the other back piece creating the pocket, pin and sew.  Trim your edges if necessary and clip the corners (careful don't clip your stitch) and turn your pillow cover out.  All done!


No perfect straight lines for me, I love the zigzag effect here.


Monday, February 27, 2012

The Upcycled Jean Quilt

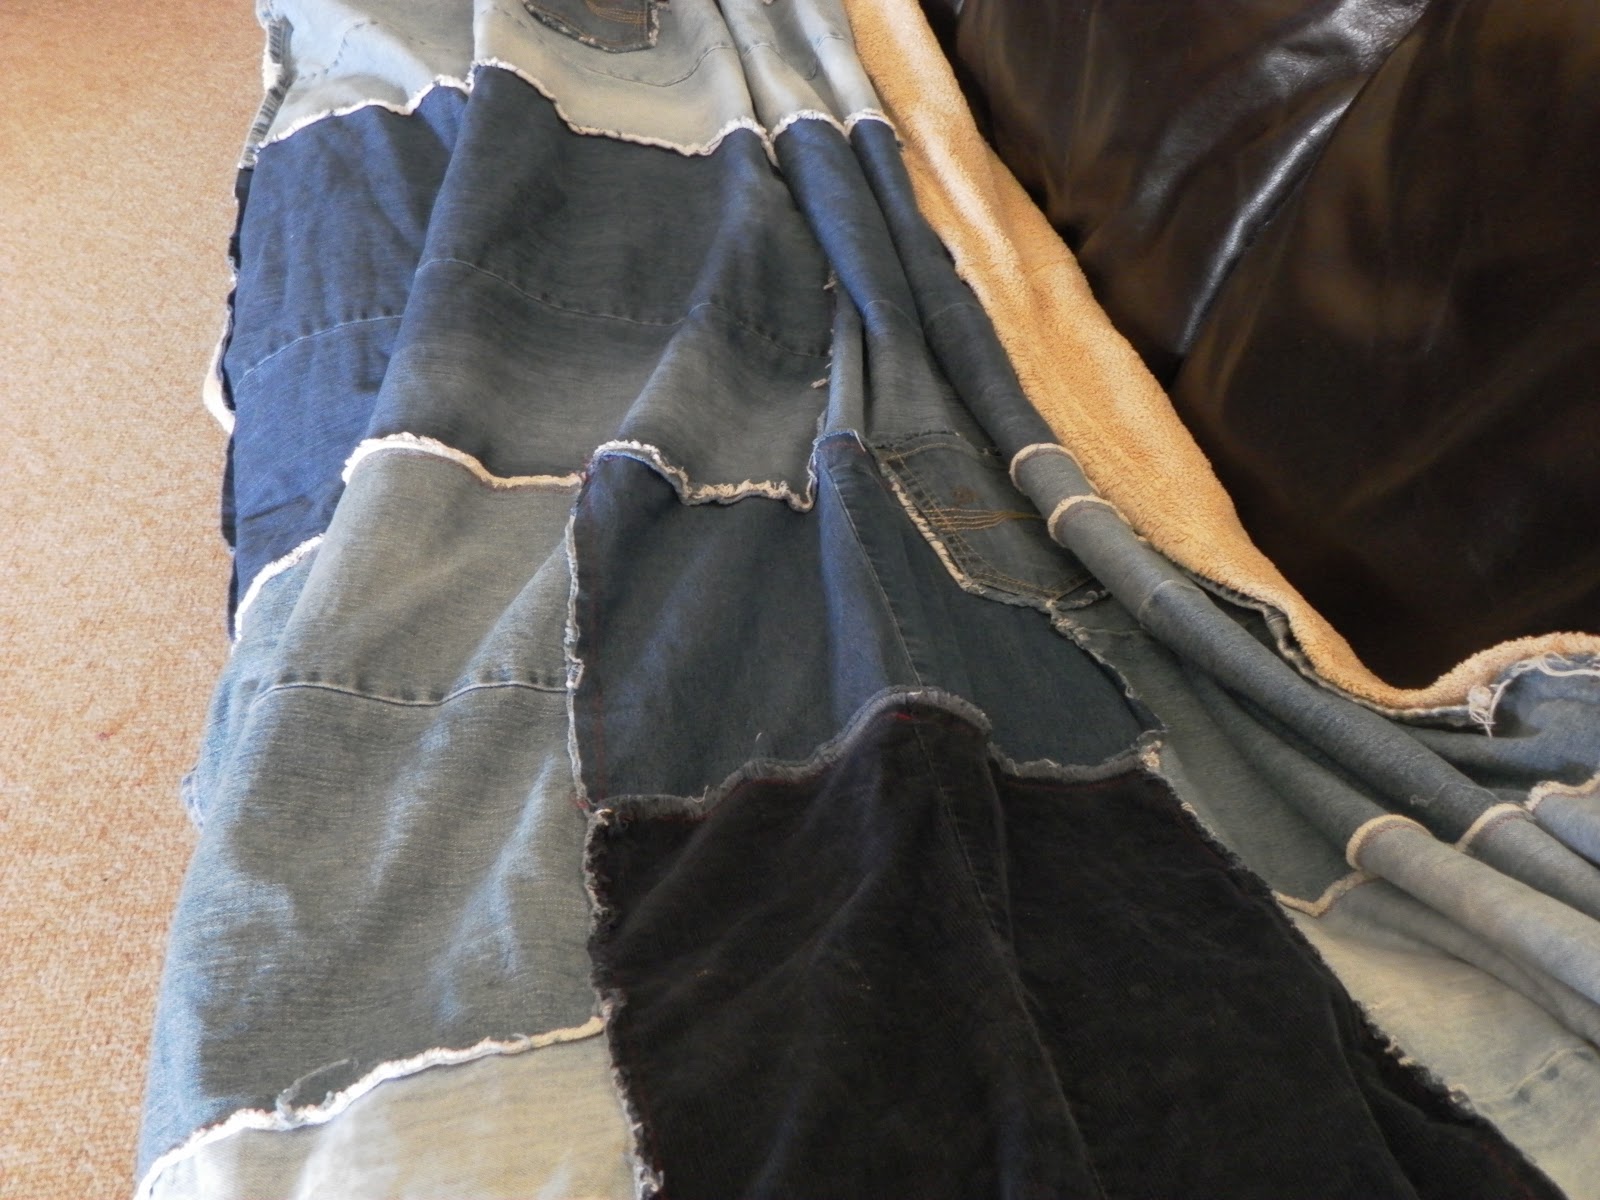
I wanted something that was soft, warm, durable, washable and most important kid friendly.  Extra perks are green (this one was free and saved these jeans from the landfill or the goodwill) and stylish or cool.  I realize that style is personal so if this isn't yours I'm okay with that.  I saved a lot of jeans.  It helps if you drop a few pounds and can use your fat jeans, that means the quilt will double as a good reminder to get your heiney off the couch later.  I also had a big blanket that was still really soft on one side but not so soft on the other.  Sorry I did not take pictures during the process.  Forgive me?  I'll try and be extra clear on directions.

First cut out all your jeans, I used 5 adult pairs and 5 kid pairs.  I left the hems on mine (they will come in to play later) and tried to make them as straight as possible.  Once have all of the big pieces in one pile and the scraps in another decide how big and what shape you want to make.  Mine is a rectangle.  I wanted for us to be able to sit on the couch together and have it cover the length of the couch plus some and be wide enough to snuggle up in, but still go over our toes.  The only thing I used to measure with was my couch.  Because I'm a rogue sewer.

I laid all of my pieces out so that the hems were facing out making the border.  Next I trimmed and pinned.  You can do the next part one of two ways.  You can sew the pieces together with the edges facing out or right side up, which will give a really cool fraying effect that will get softer with each wash or you can sew them where they face down and will be on the inside of the blanket which will be smoother.  The choice is up to you, I wanted the fray!  Once you have sewn all of the pieces together now is the time to add any embellishments that you want.  I added a few pockets for fun.

Now for the backing with that other blanket.  I put the jean quilt top on the floor.  You could have made yours the same size as the blanket to begin with but I didn't.  I was out of jeans!  I made sure that the edges were lined up with the edges of the jean quilt.  I then cut out the middle and re-sewed the blanket up the middle.  This way the finished edges were all on the outside.  With wrong sides together I pinned the blanket bottom and jean quilt top together and sewed along the edges.  Because the edges were already finished it gave it a double layered look and it was a lot less work than a normal blanket or quilt.  Note:  It really helps to do this part during nap time, otherwise people will be driving you crazy helping you.

The verdict?  This is my families favorite blanket.  It is so big that we can all use it and it is so so so warm!  I've been working hard at saving all of my newly too big jeans as well.  It helps to have kids that are growing like weeds as well.  I want to make a more traditional quilt with jean blocks, but that one will probably take much longer to put together.  This one took about 3 hours total cutting, piecing and sewing.  Of course that 3 hours was divided up over about 2 days.

It spans the entire length of the couch- no complaining about not having enough!

Every time I wash it they fray gets better and softer.

Had to add some pockets!

The super soft side.

Here is a closer look at the edge.  

It also gets softer with every wash and its really warm!
I'll show you what I did with my scraps tomorrow.  A jean quilt needs some jean pillows right?