Pages

Showing posts with label Remodel. Show all posts

Tuesday, August 5, 2014

A little adventure

Last fall we drove from Oklahoma to Oregon to pick up a 1978 Argosy Airstream from my dad. We traveled through Denver, Yellowstone, beautiful Pacific beaches, downtown San Fran at rush hour hauling the airstream and Disneyland. We pushed hard on the way back to just get back in time and stayed extra at Disney so we missed The Grand Canyon. We crammed a lot in, which simply made us hungry for staying in one place and really exploring on our next little adventure. 

We visited Yellowstone and saw Old Faithful while basking in the most beautiful smell of real pine trees. The kids saw the ocean for the first time. My ocean, with cool water on a wonderfully cloudy and foggy day (in true Northern California/Oregon style). My kids got to see part of the not so little town I grew up in just north of the Bay in San Fran. I really missed mom when I was there, something fierce.We went to Disneyland and managed to surprise the kids. It was magical and I can't wait to go back and really spend some time in each place. Now we are busy remodeling our little Airstream to get it ready for our next adventure. 

I will really introduce our Airstream in the next post. Since she really wasn't stay ready we used her as a giant portable bathroom for us in the middle of nowhere. I highly recommend keeping those training potties...it came in so handy! Take lots of snacks but in lots of varieties, have packs of wipes and plastic grocery sacks for trash. Take a cooler so that you can save money on drinks (crystal light and water bottles y'all). Plan out stops and expect to have an accident. Pack your kids extra clothes for the car, some gallon ziplock bags in case they have one. You'll be prepared so you won't get upset and it will be less stressful, oh and some extra towels.

I planned out our Disney trip knowing we only had 2 days at the park. I studied the maps until I knew it nearly by heart. I chose one must do ride for each kid and then we were free to explore the things that were neat and caught our eye. We did do a character lunch at Ariel's Grotto...worth every penny. We also got the photo pass and we will get it every time we go from now on. I have great pictures of ALL of us. The photographers are really great and really do know how to get the best shot wherever you are. It was truly two days of magic!

I could have stayed at Yellowstone for forever. Breathtakingly beautiful. I cannot wait to take our Airstream and have some awesome little adventures with the kids. We stayed at The Yellowstone Hotel. It has been beautifully restored in the lobby and dining areas, and they are working on the rooms. It was a little Shining-esque, but only for Dale and I :). I want to really camp next time. I spotted lots of animals and it was fun looking for them while we drove. 

It was fun and exhausting...worth every second!


Monday, February 27, 2012

The Upcycled Jean Quilt

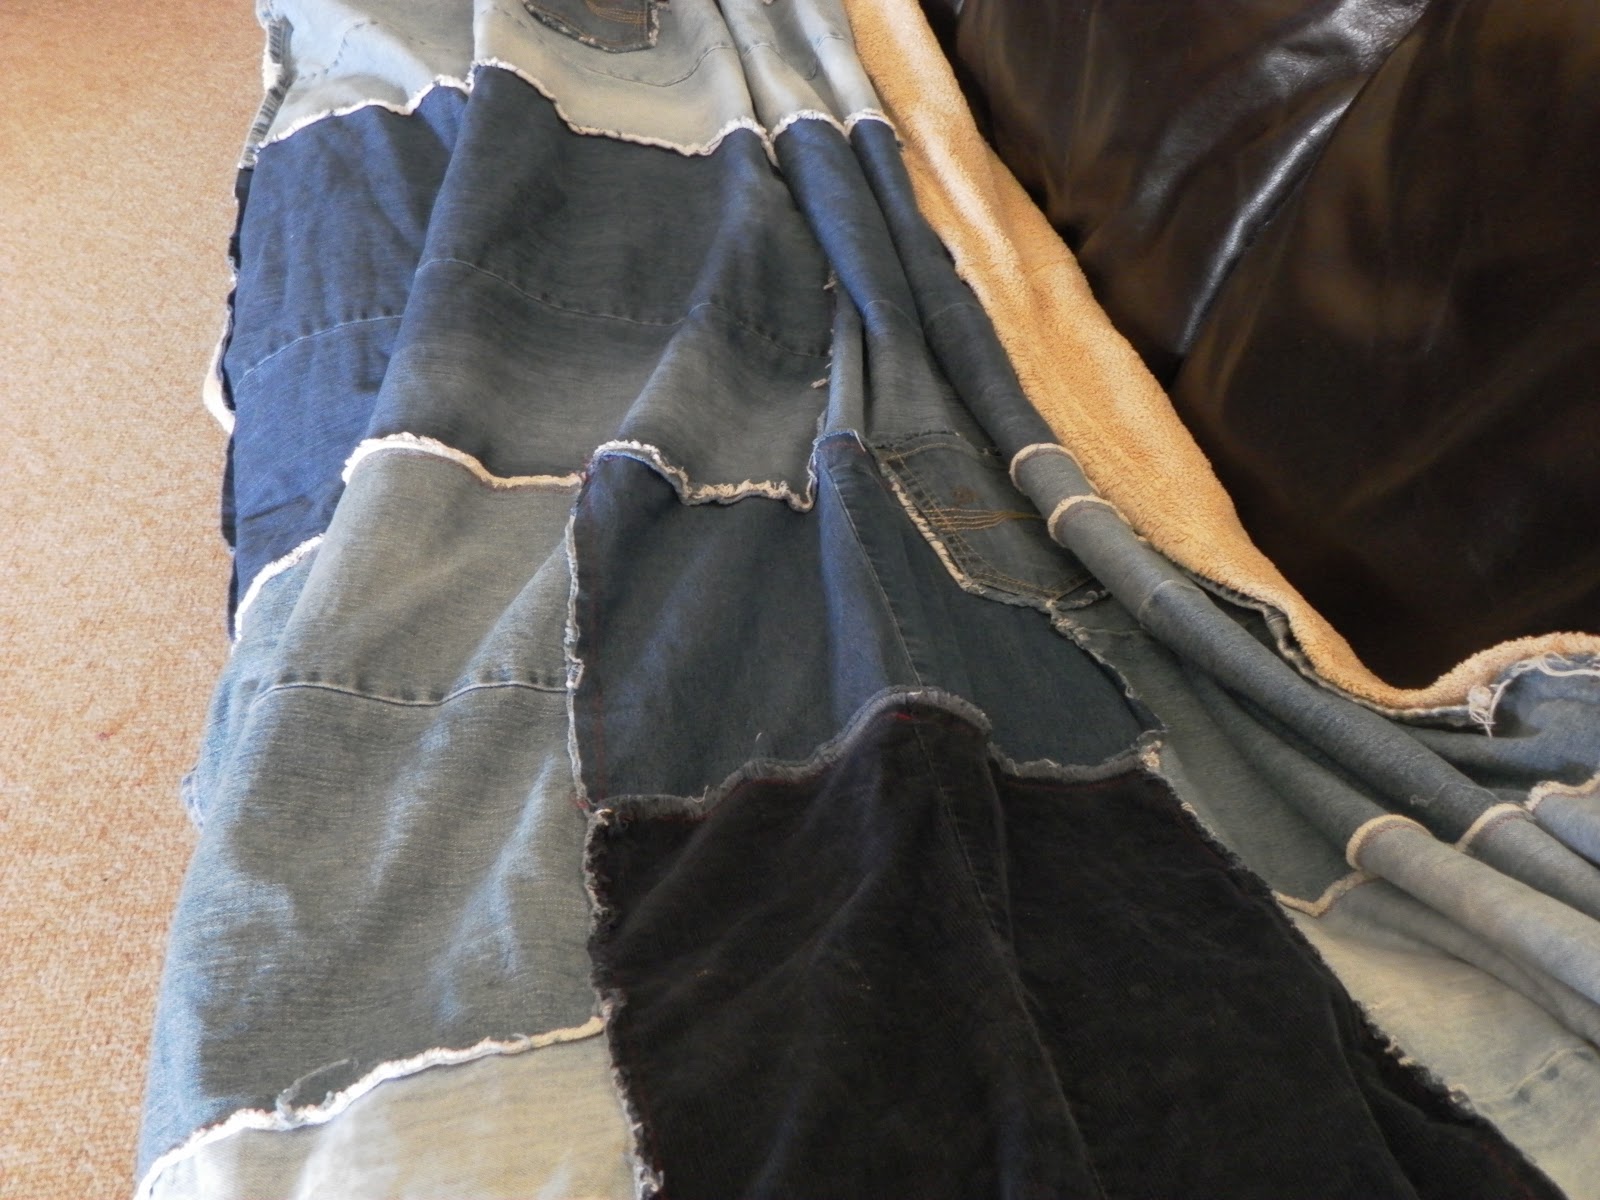
I wanted something that was soft, warm, durable, washable and most important kid friendly.  Extra perks are green (this one was free and saved these jeans from the landfill or the goodwill) and stylish or cool.  I realize that style is personal so if this isn't yours I'm okay with that.  I saved a lot of jeans.  It helps if you drop a few pounds and can use your fat jeans, that means the quilt will double as a good reminder to get your heiney off the couch later.  I also had a big blanket that was still really soft on one side but not so soft on the other.  Sorry I did not take pictures during the process.  Forgive me?  I'll try and be extra clear on directions.

First cut out all your jeans, I used 5 adult pairs and 5 kid pairs.  I left the hems on mine (they will come in to play later) and tried to make them as straight as possible.  Once have all of the big pieces in one pile and the scraps in another decide how big and what shape you want to make.  Mine is a rectangle.  I wanted for us to be able to sit on the couch together and have it cover the length of the couch plus some and be wide enough to snuggle up in, but still go over our toes.  The only thing I used to measure with was my couch.  Because I'm a rogue sewer.

I laid all of my pieces out so that the hems were facing out making the border.  Next I trimmed and pinned.  You can do the next part one of two ways.  You can sew the pieces together with the edges facing out or right side up, which will give a really cool fraying effect that will get softer with each wash or you can sew them where they face down and will be on the inside of the blanket which will be smoother.  The choice is up to you, I wanted the fray!  Once you have sewn all of the pieces together now is the time to add any embellishments that you want.  I added a few pockets for fun.

Now for the backing with that other blanket.  I put the jean quilt top on the floor.  You could have made yours the same size as the blanket to begin with but I didn't.  I was out of jeans!  I made sure that the edges were lined up with the edges of the jean quilt.  I then cut out the middle and re-sewed the blanket up the middle.  This way the finished edges were all on the outside.  With wrong sides together I pinned the blanket bottom and jean quilt top together and sewed along the edges.  Because the edges were already finished it gave it a double layered look and it was a lot less work than a normal blanket or quilt.  Note:  It really helps to do this part during nap time, otherwise people will be driving you crazy helping you.

The verdict?  This is my families favorite blanket.  It is so big that we can all use it and it is so so so warm!  I've been working hard at saving all of my newly too big jeans as well.  It helps to have kids that are growing like weeds as well.  I want to make a more traditional quilt with jean blocks, but that one will probably take much longer to put together.  This one took about 3 hours total cutting, piecing and sewing.  Of course that 3 hours was divided up over about 2 days.

It spans the entire length of the couch- no complaining about not having enough!

Every time I wash it they fray gets better and softer.

Had to add some pockets!

The super soft side.

Here is a closer look at the edge.  

It also gets softer with every wash and its really warm!
I'll show you what I did with my scraps tomorrow.  A jean quilt needs some jean pillows right?

Friday, January 27, 2012

Easy Fabric Scrap Bunting

I love buntings and wanted to make one just because.  So I pulled a bunch of fabric scraps and cut them into strips, varying in width and length.  I sewed them onto some vintage seam binding making sure to leave enough on each end to use as a tie.  I decided to add some letters to it and put it in the mudroom as a welcome banner.  I think it would probably be cuter with fabric letters, but I love the versatility that the reusable vinyl letters have.  If I want to change the greeting I can!


Come on in!


Wednesday, March 16, 2011

Dining Room Remodel

When we first moved in there was black and gold fruit wallpaper and a dated glass tile fixture.  We took out the wallpaper, replaced the chandelier and gave it a fresh coat of paint.  I wanted it to be filled with the things I love, vintage, romantic as well as be inviting and functional with a touch of femininity.  I also love deep rich wood.  Everything in my dining room fits this description now.  

Most of the plates on my wall were my grandmothers, the big silver spoon was my great grandmothers. There are vintage milk bottles and an old flour sifter.  The book was one I found in my garage, its from the 1950's and is all about San Francisco cuisine (and I'm from San Fran so it has extra sentimental value.)  The curtains I made for our bedroom when we lived in Edmond.  I wanted to use them again because I love the color and texture.  It goes well with the colors in our living room and ties the spaces together.  This was somewhat important because they flow into one another.  The curtain ties are just pieces of vintage lace seam binding from my mothers stash she gave me.  I love that I could re-use these curtains.  I have a hard time letting go of things that I've made.

My husband and I made our chandelier based off of the Mason Jar Chandelier tutorial at Kara Paslay Designs and we put the old one up in the attack.  I found Kara through Ashley Ann's blog, Under the Sycamore, I read her everyday.  I'm totally addicted!  Anyway we tweaked it a bit and used spray paint to make the lids of the jars and the cover at the ceiling match.  I still think we should add a few more, but its not on the top of my to-do list if you know what I mean.  Dale also used super strong magnets to attach the cover to the ceiling. 

I love that its sweet, nostalgic and functional without being too fussy, stuffy and too over the top.  I still feel like there are a few more things to add but I've been really picky and I don't want it to look too busy.  It's a finished work in progress I suppose. 
I love this table.  We fill all of the seats.


I still use this flour sifter.  Its functional and decorative.  Mostly because I'm too lazy to buy a new one.


This is my favorite plate from my Grandmother.  It's chipped, but I love it- unconditionally!